Teddy’s Room

Here is the long awaited post on Teddy’s Room! Let’s start with a little background, shall we?

Alex and I tried for 10 months to get pregnant, which is not long by many people’s standards but was definitely a trying time in our lives. Anyway, we were originally living with a dear friend and we weren’t going to be able to afford the same apartment without her, so we went in search of a one bedroom that was about $300 cheaper a month. We found one in Camarillo, 740 sq ft, wood floors, pet friendly, a large kitchen, BUT only one closet and hardly any storage. We knew if we were to get pregnant that it would be a challenge, but we thought it might continue to take us a while and we were running out of options. So, we went for it and signed a 15 month lease. Then, a month after we moved in, we found out we were pregnant! Thus, the transformation began.

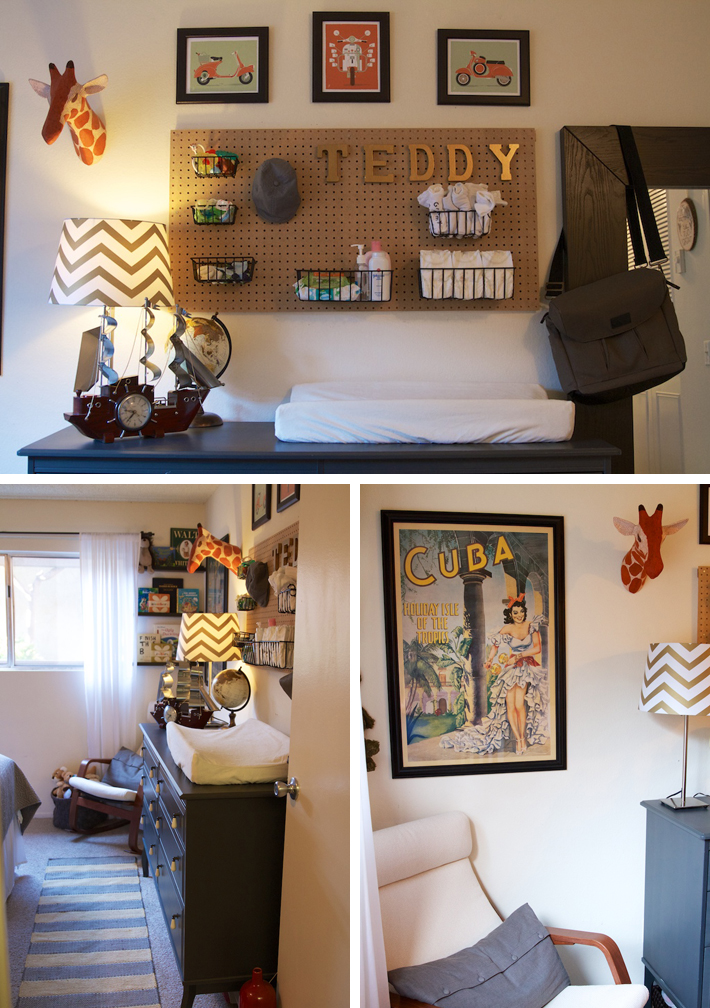
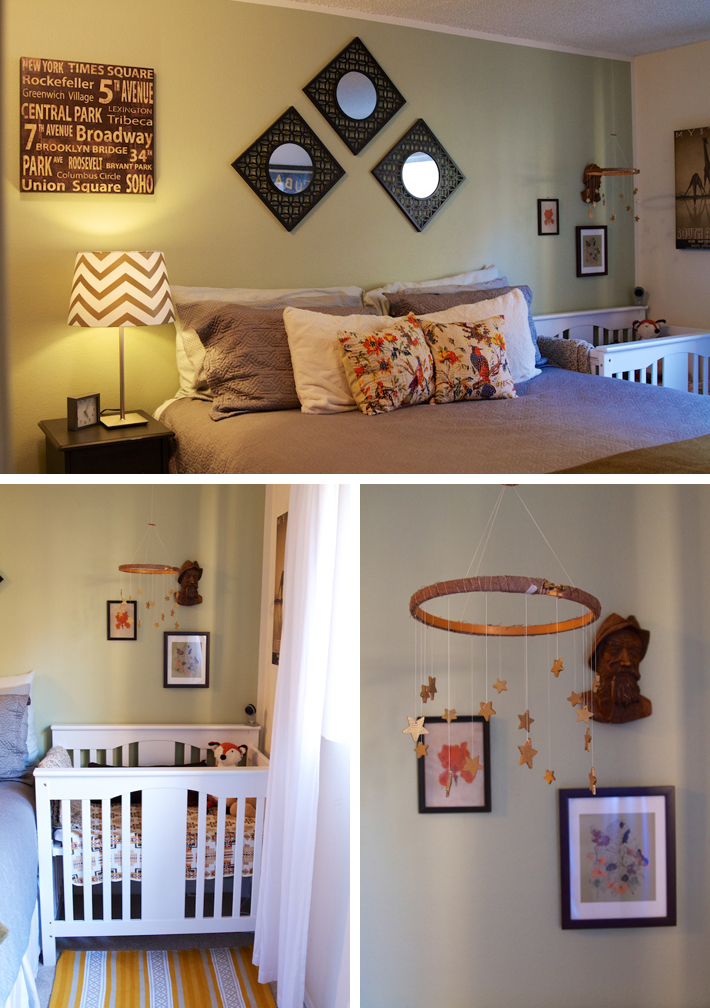
Our little one bedroom has definitely turned into Teddy’s place, but we’re completely fine with that. Little kid stuff is uber cute and since we already had a sort of theme going in our room, we decided to expand on it for Teddy. Our “theme” for him is “adventure”. We are hoping that Teddy has a global view on life. We want him to look past where he lives, the friends he has, etc. and seek adventure — so, we decided to flood the poor kid with subliminal messaging. We have travel posters, vintage finds, homemade treasures, globes, books and items from around the world to decorate his space.

We decided to use our current dresser and transform it into a changing table, but we still needed the drawer space because we only have ONE closet! So, we also opted for a pegboard solution to hold onesies, diapers, and changing necessities.

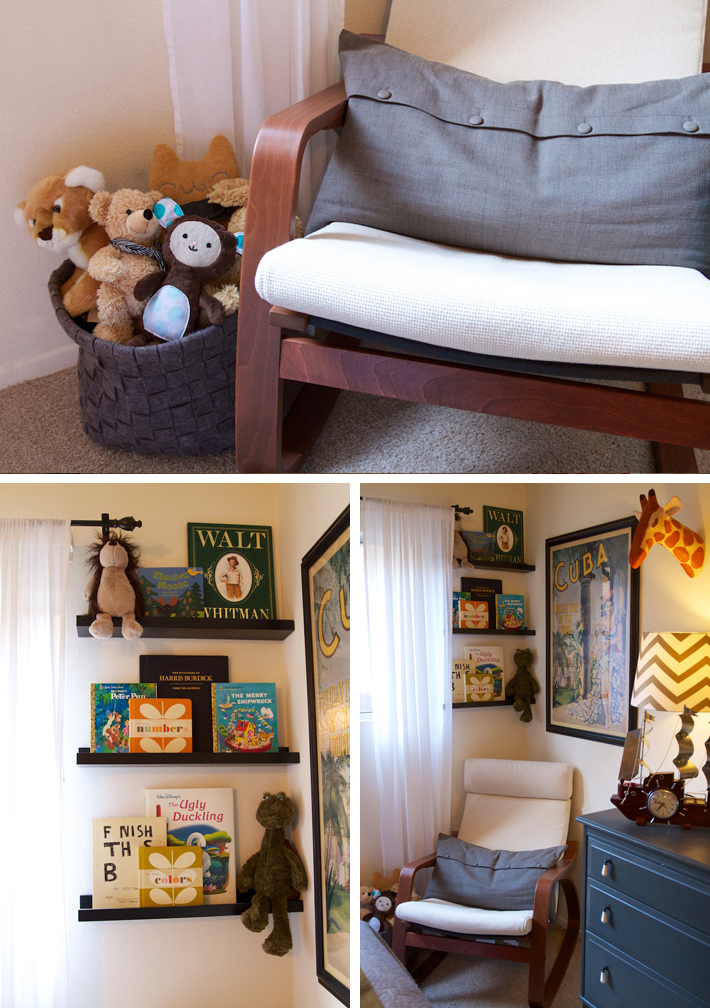
I really wanted a little reading/rocking area in the corner so we found an IKEA rocking chair and some small IKEA shelves to house some bedtime books. The lamp has a very dim light to read by at night and the basket next to the chair is full of stuffed animals and handmade blankets.

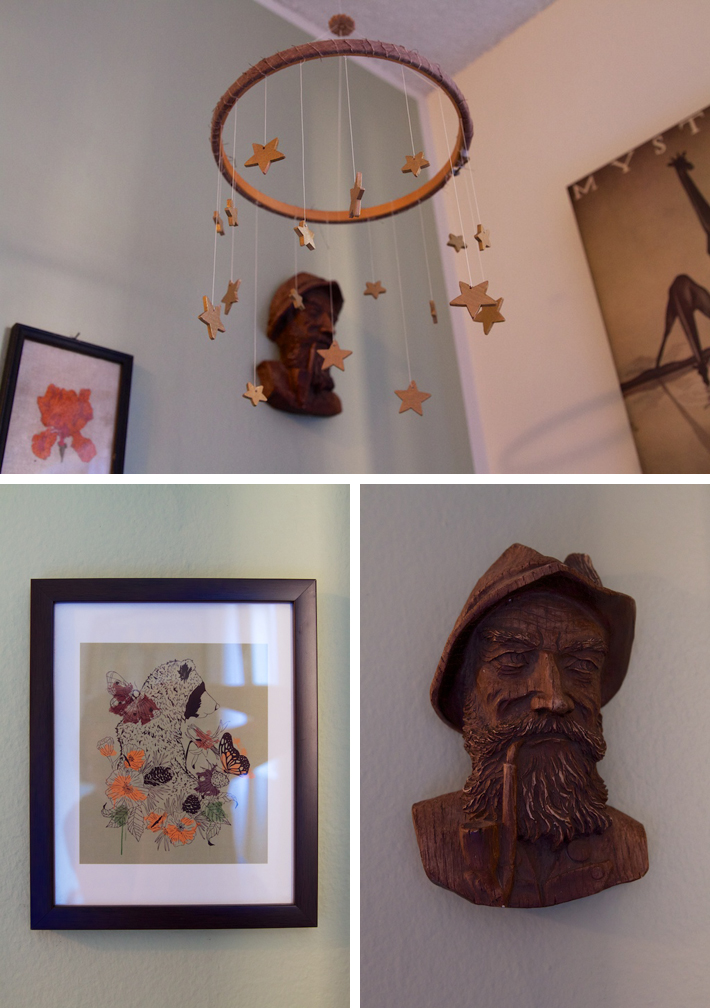
We also have some very unique and special treasures throughout the room. A vintage bust of a sea captain that we found in a store called “Treasure Island” in Santa Paula — if you get a chance to go, please do and say hello to the store owner, Robert. He was an ad designer in the 60’s for Nordstroms and has some amazing stories. We also have a piece drawn by a friend Kyle Naylor called “Northern Bear”. I purchased it before we knew we were pregnant in hopes that I could put it over our little baby’s crib. Check out his stuff, here. I also made Teddy’s mobile. I wanted to continue with the adventure theme and imagined him camping outdoors and looking up at the stars. I used an embroidery hoop, some of Alex’s Abuelita’s fabric from her sewing box and painted gold stars.
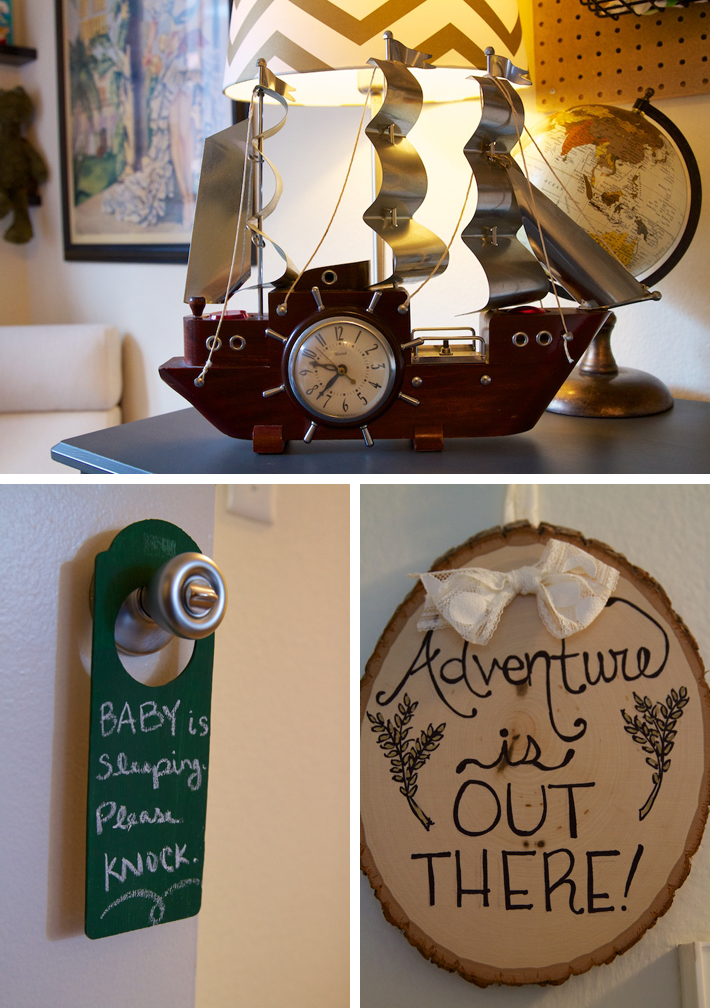
I also made a door hanger (for the front door) asking people to knock because Boone loves to bark when someone rings the doorbell. In addition, I wanted to include one of my favorite quotes from Disney’s Up, “Adventure is Out There!”, so I found a wood plaque at Michaels and drew it up. Finally, and probably one of my favorite details, is this vintage ship clock/nightlight. It belonged to Alex’s Abuelito and his brother found it in the garage of their house. He gave it to us as a gift for Teddy. I’m not actually even sure what era it’s from, but it still works as a clock and a night light!

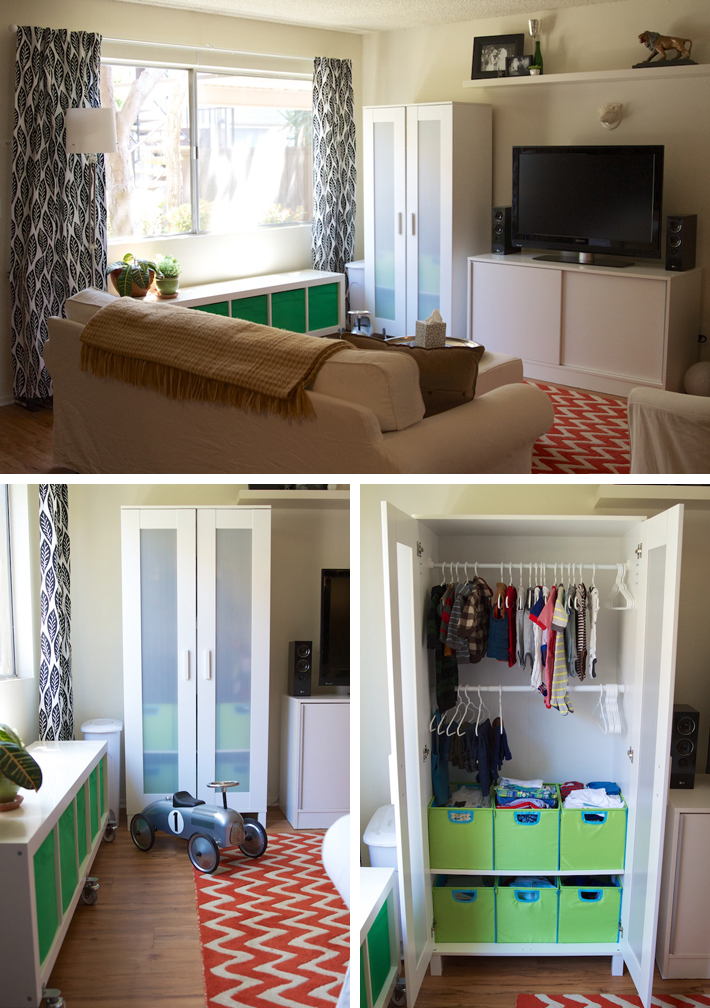
Now, where are we going to put all of this kid’s clothes?! Off to the living room we go! Alex and I found a wardrobe from IKEA that worked perfectly in the space; then purchased a bookshelf from IKEA as well, turned it on it side and made it a bench under the window. All of Teddy’s clothes fit into the wardrobe and the bench houses his toys. Yay!

So, there you have it folks! I hope you enjoyed the little tour of Teddy’s space. We can’t wait for him to make a complete mess of it all and I’m well aware that this is probably the cleanest my house will look until he’s 3 and we make him do chores.

Only a few more days (hopefully) until we get to bring him home!
Baby | Week 16

Well baby avocado, we made it to 16 weeks! I haven’t felt you move yet but we did find out what you are…

A BOY!

Daddy and I knew it all along.

We are so excited to meet you in about 4-5 months!

Now, start kicking so Mommy can stop freaking out and feel you already!

*   *   *

Helllllloooooooooo second trimester! Amen and Hallelujah for feeling better. I still don’t have that extra burst of energy, but my morning sickness has subsided significantly. This week, we got to find out what we were having and it was so exciting!

I had spoken to Alex about 1) If we even wanted to find out and 2) how we wanted to tell everyone. He had seen some of the “Gender Reveal” parties I had done for some friends and wanted us to have “one of those parties”. So, my bestie Amy and I set out to plan it. I drove her crazy because I practically had no opinion about decorations or anything. They say planning a party for a party planner is a stressful job… whelp, not this planner! I was exactly the same way about my wedding.

“Oh, they don’t have those flowers? Eh that’s okay, we’ll just do these ones.”

Originally, Alex and I already had an appointment on Thursday to see the babe and we asked if the doctor could write the gender in a sealed envelope so I could give it to Amy. He agreed and he looked and looked and poked and pushed and after a while he said, “Okay, I think I got it, but the placenta is in the way so I can only give you an 80-90% accuracy on the gender.”

80-90%?! That’s a B. My baby is not going to be a B baby… we want A+s people! So needless to say, I scheduled another appointment to confirm the gender.

Amy and I celebrated her birthday on Saturday morning with Starbucks and pedicures, then it was off to the Baby’s First Photos in Riverside before hitting a movie. I was surprisingly calm and the techs were great.

We got confirmation that the gender was 100% accurate, but I told Amy I didn’t want to know if the doctor’s and this tech’s prediction were the same or different because it would freak me out.

She agreed but then I couldn’t take it and kept asking — she wouldn’t tell me.

What a good friend.

Anywho, Sunday came and all our family and close friends arrived wearing either pink or blue based on their guess of the baby’s gender!

TEAM BOY (The Winners!)

TEAM GIRL

We mingled and ate and then we walked over to the giant box that would be filled with both pink and blue balloons.  Amy told us that she had secured two balloons with strings to the bottom of the box and that after all the other balloons flew out the two would remain in the color of the baby’s gender! So exciting.

We opened up the flap and….

BLUE BALLOONS! WE KNEW IT!!

Alex and I also made a fun little video of our gender reveal, check it out!

I can’t believe that in 4-5 short months, we will finally have our sweet little guy. I keep imagining what he will look like and imagining his first bath in the sink, waking up in the middle of the night just to check and make sure he’s still breathing, and all his squishy faces and plump extremities. Ugh, I can’t wait. Can it be May already, please?!?!

Cheers to BOYS and besties who are pretty much amazing!

DIY | Chalkboard Boxes

We have this really, really, really tall closet. And well, I’m 5’5″, so I can’t really reach the stuff at the top. I had this brilliant idea to purchase these canvas boxes to store all our stuff neatly, but there are like a million of them and now I can’t remember what is in which box.

DIY to the rescue!

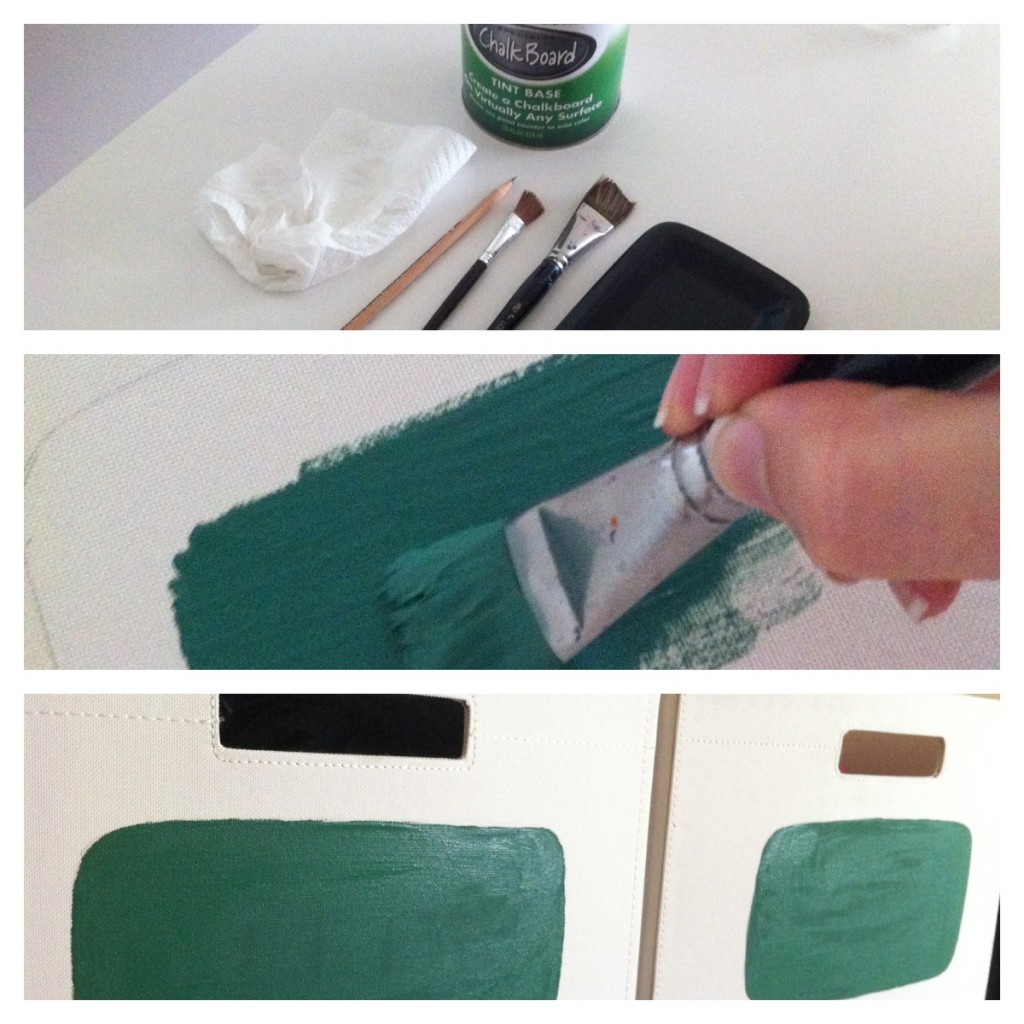
I had some leftover chalkboard paint and decided to paint squares on the boxes so we could write what was in them. Surprisingly, it’s the first creative thing I’ve done in a long time, so I’m pretty proud. Humor me.

What You’ll Need:
Rustoleum Chalkboard Paint
Brushes

What You’ll Have:
Pencil
Square shaped dish or stencil

What You’ll Do
Turn your box face-up on the side you are going to paint on.
Trace the plate or stencil in the spot you want to paint.
Shake the chalkboard paint, open it up and dip in your brush.
Start a-spredin’ the paint and carefully round the corners.
Let dry 24 hours.
Label away!

You’re done!!

I know, I know — your life is now complete. You’re welcome.

Family Yearbooks

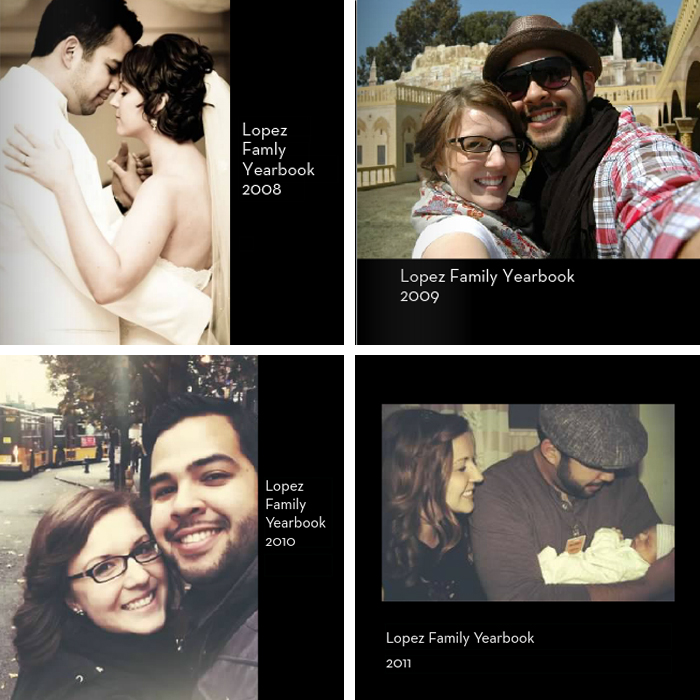
I was looking for a way to organize my photos from over the years in a book, but in a more creative way — Pinterest to the rescue! I saw a neat idea on pinterest and decided to adopt it for our family.

Using Shutterfly I started taking all my photos from iPhoto, organized by year, and began creating books complete with Alex’s and my descriptions of events, thoughts, feelings, and even funny pictures of our pets. Then, on the back pages we each sign them with our hopes and wishes for the next year.

I can’t wait to look back in the years to come at all God’s done in our lives and I’m looking forward to reading all the funny and sweet things our future kids will write in these yearbooks as well.

Happy Pinning and Creating!